Introduction:
How to install flood lights? It is one of the most important learning processes when installing outdoor lighting. However, the entire process of installation of lights is simple. However, you might face some technical difficulties while installing. So, keep reading this blog ahead to learn every step.
How to install flood lights- the simple and easy-go process

Often you would have seen that people always need professionals to help them fix lights. By learning the process yourself, you can save the cost paid to the technicians. Before jumping into the process, you should learn about preventive measures or safety concerns. Safety is necessary as you will be operating with high voltage and current.
-
Follow the safety precautions
Whenever you are about to start, first, wear rubber gloves. As you know, you are putting your hands in high voltage and high current circuits; therefore, safety is essential. Then, you shall wear rubber boats to prevent yourself from encountering electrical shock. Other than this, a wooden ladder is also something that you shall use if your height doesn’t reach the installation spot.
-
Choosing the suitable flood lights

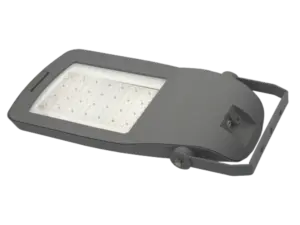
How to install flood lights? Before starting the process, you shall choose the suitable lights. You can choose an LED over the fluorescent lights. An LED comes with the latest technology and would save energy compared to other lights.
-
Look for the perfect spot to install them
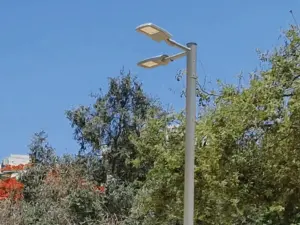
Look for an ideal spot where you can install the flood lights. Mostly, you can see such lights in outdoor places. For example, you can fix them in the garage, the house’s main entrance, the garden, the parking spot, etc. Unlike the other lights, the flood light installation begins with a high mast. Thus, remember that the light should have a certain height above the ground for greater illuminance. After the location finalizes, start with the next step.
-
Cut the power supply from the main electrical board
To begin with flood light installation, you shall first cut off the power supply. You can locate the specific breaker inside the main breaker box of your house. Make sure before making any connection you initially trip the breaker off. Otherwise, there is always a risk of short circuit. When you finish it, shut off the breaker box’s door.
-
Establish a new connection for the LED light
The flood light installation starts when you begin making a new connection. With the help of a drill machine, you can drill the holes at the location you selected for the light. Then, explore the nearby area, and you will find a junction box. Inside this box, you will find wires for multiple connections. Take a wire that you can easily connect for installing flood lights.
Then, figure out the wires connection. For this, you can fix the corresponding colors of wires coming out of the junction box with the connection for the circuit. You will find its details below.
-
Fixing the new LED flood light
Here is the most crucial step in the process of flood light installation. Do you know why? That’s because, in this step, you will install the fixture of light. After unpacking the brand-new light, you will come across three different wires. Now, establish a connection by connecting the three wires with the three wires already coming from the main supply of the circuit.
Installing flood lights proceeds when you connect the red-colored live wire to the live wire of the power supply. Then, connect the earth and neutral wires similarly. Once you are done with the wires connection, you can cover the ends of the wires with plastic caps. This technique keeps the wires protected against moisture or seeping water. Hence, to conclude this, it prevents short circuits from occurring.
How to install flood lights? The query further elaborates on the installation of a fixture of flood lights. For this, you will require an open-end wrench. Then, with the help of this tool, you can attach the mounted strip to the fixture of light. Hold the tool in your hand and place it before the light fixture. Now, with twist motion, you can tighten the fixture completely. Fix this fixture to the location you selected with screws.
- Adjust the angle of light
By rotating the flood light mount, you can fix it to a specific angle. Make sure you adjust the position of the light in a way that illuminates a wide outdoor area.
- Turn the breaker on
How to install outdoor flood lights? The process comes to an end. You can now turn on the breaker switch that you previously turned off. After turning it on, if the light illuminates, then it’s great! You have successfully installed the light. However, the wiring is wrong if the flood light doesn’t show illuminance.
The cost of installing and fixing the flood lights

How much does it cost to install flood lights? The price range to fix the lights starts at $7 and ends at $5500. Similarly, if you opt for commercial flood lights, the installation differs from the light you can install at home. That’s because commercial lightings require a large-scale setup and more perfection. However, the lights installed at homes might not require a large-scale setup.
The flood light installation cost also depends upon the connection of the wiring. If the breaker or the junction box is far away from the location of the led flood lights installing spot, then it would charge you more. That’s because you require a long and extra wire to establish a connection. Or sometimes, you have to make another connection to meet the circuit requirement.
Similarly, flood light installation cost further depends upon the specific type of flood light and its power rating. The lights which require a higher power rating would require a large voltage breaker. Thus, it can be expensive sometimes.
It is up to you to select what kind of flood light you require or where you want to install it.
Conclusion:
How to install flood lights? The process and steps explained above are simple. You can go through these and do this job yourself without hiring an electrician.
